- Outdoor Clothing and Footwear

- All in the category Outdoor Clothing and Footwear
- Footwear

- Jackets

- Military Blouses

- Pants

- Functional clothing

- Sweatshirts

- Shirts

- Hawaiian & Lifestyle Shirts

- T-Shirts

- Shorts and Bermuda

- Overalls

- Caps and head coverings

- Gloves

- Socks

- Belts

- Suspenders

- Scarves, shawls, neckwear

- Raincoats, ponchos

- Women's clothing

- Children's clothing

- Clothing Care and Maintenance

- Patches & Insignia

- Vests

- Camping and hiking

- All in the category Camping and hiking
- Backpacks

- Bags, satchels, suitcases, waist bags

- Sleeping in nature

- Cookers, grills

- Lighting a fire

- Outdoor Dishes and Tableware

- Dining in nature (Food for the journey)

- Survival kit

- Compasses

- Climbing equipment

- Flashlights

- Camping furniture

- Eye-glasses

- Telescopes

- Hydration

- Water purification

- Small Equipment and Essentials for Survival

- Electronics and accessories for mobile phones

- Watches

- Cases

- Paracords

- Wallets

- Towels

- Solar showers

- Waterproof notebooks

- Mosquito and insect protection

- Foot, hand, and body warmers

- Repair Kits and Adhesive Tapes

- Boating equipment

- Health, protection

- Tactical Gear

- All in the category Tactical Gear
- Plate Carriers and Tactical Accessories

- Load-bearing harnesses

- Tactical vests

- Tactical cases and pockets

- Ballistic protection

- Hearing protection

- Protection

- Tactical and military backpacks

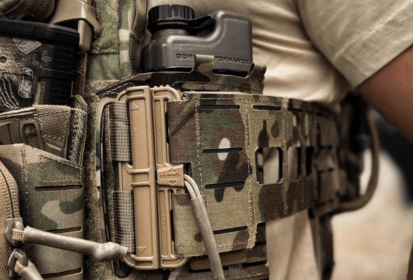
- Tactical and combat belts

- Tactical Eyewear

- Flashlights for soldiers and police

- Helmets, coverage

- Camouflage

- Gas masks and protective equipment

- Medical equipment

- Boxes, cases

- Battering rams, crowbars

- Gear for dogs

- Shooting Supplies

- All in the category Shooting Supplies
- Shooting Glasses

- Weapon bags

- Shooting gloves

- Weapon cases

- Weapon Slings

- Optical sights

- Rangefinders

- Gun flashlights and lasers

- Cleaning, maintenance

- Gun waist bags

- Shooting bags

- Shooting mats

- Boxes and cases for ammunition

- Training equipment for shooting

- Bullet traps

- Speed loaders

- Knives and Tools

- Self-defence

- Firearms and Ammunition

- Other

- By interest

How to Prepare for Winter Hiking: Clothing, Footwear, and Gear for a Safe Full-Day Trip
Winter hiking is a great combination of movement, fresh air, and physical challenge—but only if you are properly equipped. Winter does not forgive mistakes: short daylight hours, rapidly dropping temperatures, wind, ice, and snow can quickly change the nature of a route and require a more cautious approach. Proper equipment is not an extra comfort; it is the foundation of a safe return.
This guide summarizes the essential elements you need for a short to full-day winter hike in lowland and mid-altitude terrain, including clear recommendations on how to choose clothing and gear that will support you when conditions become demanding.
1) Planning a Winter Hike: Safety, Route Selection, and Timing
A winter hike does not start with choosing clothing and gear—it starts with selecting the right route, setting an appropriate pace, and choosing the correct time of departure. Winter conditions may remain stable for hours, but they can also change rapidly. Shaded north-facing slopes often develop icy sections, wind significantly increases wind chill, and short days reduce the time margin for a safe return.
Good planning helps minimize unpleasant surprises and keeps the hike under control from start to finish.

Winter hiking emphasizes the importance of proper layering of clothing and a well-chosen backpack.
What to Check Before a Winter Hike
- Weather: temperature, wind, wind chill, and precipitation. Wind can significantly lower the perceived temperature—often by tens of degrees.
- Daylight: winter days are short; plan your return with a 1–2 hour time buffer.
- Terrain: icy sections, steep slopes, and shaded trails where ice persists longer.
- Signal coverage: some valleys, forests, and ridgelines may have limited or no mobile reception.
- Share your plan: inform a trusted contact of your planned route and expected return time.
Specifics of Movement in Winter Terrain
In winter conditions, always account for the following:
- your pace will be slower than in summer,
- breaks need to be shorter to prevent excessive cooling,
- electronics drain faster in low temperatures.

In winter, details matter. Haago hand warmers, an extra insulating layer, and a reliable Stanley thermos can significantly improve comfort in conditions where heat loss occurs fastest.
2) Layering: A System That Keeps You Warm
In winter, comfort does not depend on how “warm” a single jacket is. The real difference is made by proper layering—often referred to as the layering system or the “onion principle.” This approach allows you to regulate body temperature according to activity level while keeping the body dry.
In cold conditions, sweat and condensation are often a greater problem than the cold itself. If moisture remains on the skin, it accelerates heat loss, reduces comfort, and significantly lowers physical performance. Layering works because each layer has a clearly defined role: moisture management, insulation, and protection from wind and precipitation.
The most reliable approach is a three-layer system, which balances moisture transfer, thermal insulation, and weather protection. When chosen correctly, this system provides comfort both during movement and while resting.
2.1 Base Layer: Thermal Underwear
The base layer has one primary function: to move moisture away from the skin as quickly as possible and keep it dry. If sweat remains against the body, heat loss increases rapidly—especially during stops or reduced activity.
🔵 Recommended Materials
➤ Merino wool
- naturally regulates body temperature
- insulates even when damp
- excellent antibacterial properties (resists odor)
- ideal for long-duration and variable-intensity activities
➤ Synthetic fabrics (polyester, polypropylene)
- dry very quickly
- lightweight and durable
- well suited for high-intensity activity or individuals who sweat heavily
🔵 What Does Not Belong Next to the Skin
➤ Cotton
- absorbs sweat and retains moisture
- causes rapid cooling once activity stops
- significantly increases the risk of chilling and heat loss
👉 Practical Tip
Your base layer should fit close to the body without restricting movement. A loose fit reduces moisture transfer efficiency and compromises overall performance.


2.2 Second Layer: Insulation
The second layer creates an insulating buffer between your body and the surrounding environment. Its primary role is to retain the heat your body generates during movement. At the same time, it helps continue the transfer and distribution of moisture moved away from the skin by the base layer, preventing it from accumulating next to the body.
An effective insulating layer must strike a balance between warmth, breathability, and moisture management. This layer plays a critical role both while moving and during short stops.
🔵 Suitable Materials
➤ Fleece (various weights)
- quick-drying
- does not feel cold when damp
- a versatile and reliable choice for most winter activities
➤ Primaloft® / synthetic insulation
- excellent thermal efficiency
- retains insulation even when wet—crucial in winter conditions
- suitable for both active movement and longer rest periods

Merino thermal underwear Devold works exactly where you need it most in winter — keeps the body dry, maintains a stable temperature, and doesn't disappoint even during longer stops. The foundation on which all winter gear stands.
➤ Lightweight Down Jacket
- excellent warmth-to-weight ratio
- ideal as a backup insulating layer carried in your pack
- not suitable for high-intensity movement, as it leads to rapid overheating
👉 Practical Tip
For a full-day winter hike, it is worth carrying one spare insulating layer in your backpack. This layer often makes the decisive difference in comfort during breaks or when weather conditions deteriorate.
2.3 Third Layer: Protection from Wind and Water (Shell Layer)
The outer layer protects you from external elements—wind, wet snow, rain, and sudden weather changes. Wind, in particular, dramatically increases heat loss and can cool down even a well-insulated body in a very short time.
The purpose of the shell layer is not to provide warmth on its own, but to preserve the insulation beneath it by blocking wind and moisture.
Softshell vs. Hardshell: How to Choose
➤ Softshell
- highly breathable
- comfortable and quiet during movement
- partially wind-resistant
- handles light rain or brief showers, but is not fully waterproof
- ideal for active movement in dry conditions or temperatures around freezing
➤ Hardshell (membrane jacket)
- fully windproof and waterproof
- provides reliable protection against wet snow and sustained precipitation
- better suited for exposed ridgelines and unstable weather conditions
- also recommended as a “backup” or safety shell carried in your pack on any full-day winter trip


Parameters Worth Paying Attention To
➤ Water Column Rating
- Minimum for winter conditions: 10,000 mm
- Ideal for demanding mountain conditions and prolonged precipitation: 15,000–20,000 mm
➤ Breathability (RET / MVTR)
- RET < 6: very good breathability
- RET 6–12: sufficient for most winter activities

A hot drink in winter is more than comfort—it is part of effective heat management. A reliable thermos and a well-organized backpack help maintain energy levels and pace as temperatures drop and daylight shortens.
Practical Design Features That Improve Comfort and Protection
Beyond membrane specifications, real-world performance depends heavily on construction details. These elements determine how effectively a shell protects you in actual terrain, how efficiently you can vent excess heat, and whether you stay dry as conditions deteriorate. While often overlooked, these features are critical for both comfort and safety in winter conditions.
➤ Hood
- should be easy to adjust and cinch down securely
- ideally helmet-compatible (or at least compatible with a beanie)
- a well-shaped brim significantly improves protection against wind and snow
➤ Ventilation zips (“pit zips”)
- essential for regulating temperature during ascents
- significantly reduce the risk of overheating and soaking inner layers with sweat
➤ Taped seams
- prevent water penetration through stitching
- crucial in prolonged precipitation and wet snow
➤ Covered or water-resistant zippers
- protect the most vulnerable entry points from moisture
- strongly recommended on any hardshell jacket
➤ Cuffs
- adjustable via hook-and-loop fasteners or elastic
- prevent heat loss and keep snow out of sleeves
➤ Hem (jacket bottom)
- drawcord adjustment helps retain warmth
- reduces wind entering from below
2.4 Accessories: Small Items That Make a Big Difference in Winter
Accessories often determine overall comfort and safety. In winter conditions, body extremities—fingers, ears, and the nose—lose heat the fastest and require special attention.
What You Should Definitely Consider
🔵 Gloves
Carry at least two pairs:
- a thinner, breathable pair for movement
- a thicker backup pair for colder, windier conditions or longer static periods
A combination of fleece, softshell, and waterproof materials covers most scenarios without significantly compromising dexterity.
🔵 Head and neck protection
A beanie, balaclava, or neck gaiter provides effective wind protection and significantly reduces heat loss. The neck gaiter, in particular, is often underestimated—yet covering the neck and lower part of the face is one of the most efficient ways to stay warm in harsh wind.
🔵 Protective eyewear
In exposed terrain or under intense winter sunlight, eye protection is highly beneficial. It improves comfort in strong winds, prevents excessive tearing, and helps maintain orientation in whiteout conditions, where contrast disappears and surface irregularities become difficult to detect.

Gloves protect hands from cold and wind — in winter, it's practical to have an extra pair in the backpack.
3) Footwear and Traction: Mechanical Confidence on Snow and Ice
The right combination of footwear, socks, and traction aids plays a decisive role in maintaining stability, comfort, and overall safety during winter movement.
Quality winter footwear must accomplish three things: keep your feet warm, prevent soaking, and provide a sure step on snowy or icy terrain.
3.1 Winter Trekking Boots: What to Focus On
Quality winter footwear must accomplish three key tasks: keep your feet warm, prevent moisture ingress, and provide reliable traction on snow and ice.
🔵 What to Look for When Choosing Winter Boots
Insulation
Synthetic insulation or natural insulating materials help retain warmth without unnecessarily increasing weight. Proper insulation is especially important during longer breaks or slower-paced movement.
Waterproof membrane
A membrane protects against moisture from snow and meltwater. To function effectively, it must be paired with breathable, moisture-wicking socks that move sweat away from the skin. Otherwise, moisture accumulates inside the boot.
Outsole
A deeper tread pattern and a stiffer sole construction provide better stability and traction on snow and frozen ground. Soft summer soles tend to lose grip and stability in winter conditions.
Boot height (ankle collar)
Higher-cut boots offer better protection against snow entry and provide increased ankle support. This is particularly valuable in uneven terrain and when moving through deeper or compacted snow.
🔵 Socks: A Small Detail That Makes a Big Difference
The right socks account for a significant part of overall foot comfort. Winter boots alone are not enough—layering and moisture management are just as important for your feet.
Merino wool socks
- excellent thermal insulation
- effective moisture wicking
- naturally odor-resistant, even during extended use
Two-layer sock systems
- thin inner layer wicks sweat away
- outer layer provides insulation
- reduce friction and help prevent blisters
Cotton socks
- practically unusable in winter
- absorb moisture and lose insulation quickly
- significantly increase the risk of cold feet
👉 Practical Tip
If you are prone to cold feet, carry an extra pair of dry socks in your backpack. Changing into dry socks after a longer break can dramatically improve comfort and help prevent chilling.
3.2 Traction Aids and Snowshoes
Winter footwear is essential, but in certain conditions it is not enough on its own. The right traction aid can be the difference between confident, efficient movement and unnecessary risk or fatigue.
🔵 Ice Cleats (Microspikes)
Ice cleats—often referred to as microspikes—are ideal when trails are icy, covered with compacted snow, or include frozen sections.
- lightweight with immediate effect
- suitable for city sidewalks, suburban trails, and gentle slopes
- quick to put on and easy to carry in a backpack pocket
- significantly improve stability and confidence on hard, frozen surfaces
👉 Practical recommendation:
When temperatures hover around freezing—melting during the day and refreezing in the evening—microspikes are almost always worth carrying and using.
🔵 Snowshoes
Snowshoes serve a different purpose than microspikes. They are designed for deep, soft, or wind-drifted snow, where walking without flotation leads to constant postholing and rapid energy loss.
- distribute body weight and prevent sinking
- conserve energy during longer winter outings
- ideal for higher elevations, mountain meadows, and forested terrain with loose snow
- stable when used together with trekking poles
👉 Tip:
If your route alternates between firm snow and deep powder, choose a snowshoe model with quick-release bindings and aggressive traction teeth underfoot for better grip and efficiency.
🔵 Gaiters
Gaiters are a discreet but extremely practical accessory that proves useful in nearly all winter conditions.
- prevent snow from entering boots
- protect pant legs from moisture and dirt
- reduce the risk of cold feet caused by wet socks
- highly recommended whenever snow reaches above ankle height
👉 Tip:
In addition to microspikes or snowshoes, gaiters help keep pant cuffs secure and prevent snagging on bindings or traction elements.

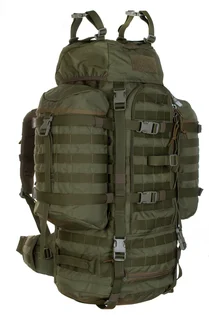
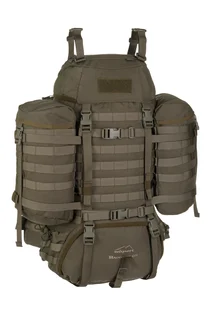
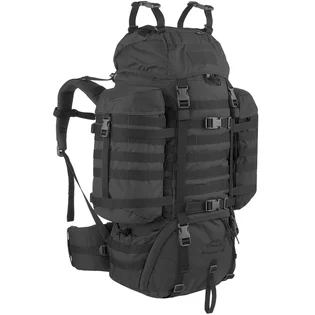
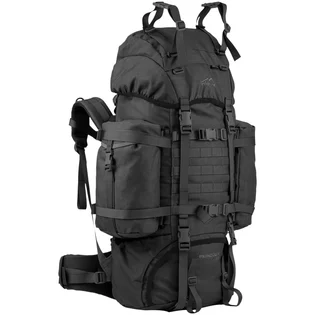
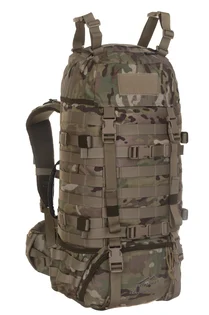
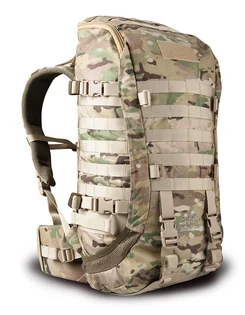
A backpack you can rely on even in winter. Durable materials, easily accessible pockets, and enough space for a thermos or spare layers—exactly what you need when conditions change faster than planned.
4) What to Pack for a Full-Day Winter Trip
In winter, it is always better to carry a few extra grams in your backpack than to risk returning wet, cold, or depleted of energy. A well-packed backpack conserves energy, helps you cope with deteriorating weather, and ensures you have essential equipment readily available—from warmth to navigation.
The following list is based on proven practice in winter terrain. It avoids unnecessary items and focuses on gear that genuinely makes a difference.
Essential Items
🔵 Thermos with a Hot Drink
- a warm drink helps regulate body temperature and significantly improves comfort
- tea, broth, or an isotonic drink—ideally around 1 liter per person
- always fill the thermos completely with a hot liquid to improve heat retention
👉 Tip:
With a thermal lid or insulated sleeve, a quality thermos can keep drinks hot for 8–12 hours.
🔵 Energy Food
- fast energy: energy or protein bars, chocolate, nuts, dried fruit
- medium-release energy: jerky, mini sandwiches, salty snacks
- calorie expenditure is higher in winter—always carry extra food as a reserve
🔵 First Aid Kit
Contents depend on trip length, but the basics should always include:
- adhesive plasters and sterile dressings
- bandage and triangular bandage
- disinfectant
- spare emergency bivy or thermal (emergency) blanket
- personal medication
👉 Tip:
A thermal emergency blanket is essential winter equipment—it weighs only a few grams but can be lifesaving in an emergency.
🔵 Knife / Multitool
- useful for food preparation, minor repairs, and material handling
- invaluable for emergency adjustments on snowshoes or traction devices
🔵 Headlamp
- winter days are short and darkness arrives quickly
- carrying a headlamp is one of the fundamental rules of winter hiking
- ideally with spare batteries or a clearly defined low-power mode to conserve energy
🔵 Power Bank
- cold temperatures drain phone batteries 2–4 times faster
- store both the power bank and phone in an inner pocket, close to the body
👉 Practical advice:
If you primarily use your phone for navigation, keep it in airplane mode or turn off mobile data to conserve battery life.

A warm drink in a quality thermos is essential in winter—it helps maintain both energy levels and core body temperature.
🔵 Map + Compass
- a mobile phone is a useful tool, but it is not a reliable navigation source in freezing temperatures
- a paper map works regardless of cold, battery life, or signal
- a compass ensures orientation even in whiteout conditions or during GPS failure
🔵 Spare Gloves and a Dry Base Layer
- in winter, sweating can occur even during moderate ascents
- changing into a dry base layer prevents rapid heat loss during breaks
- spare gloves are critical if your primary pair becomes wet
🔵 Mini Survival Kit
A small but highly practical addition:
- fire starter or waterproof matches in a plastic capsule
- whistle
- a length of duct tape wrapped around a card, bottle, or pen
- small knife or razor blade
- safety pins
👉 Tip:
Pack your survival kit so it stays in your backpack permanently. This removes decision-making and saves time every time you pack.
Optional but Very Useful Items
🔵 Seat Pad / Insulating Mat
- protects against cold and moisture during breaks
- significantly improves comfort even during short stops
- weighs only 30–80 g, but makes a major difference
🔵 Second Thermos with a Hot Drink
- useful for longer trips or outings with two people
- a second drink (e.g. broth) provides both energy and electrolytes
🔵 Hand and Foot Warmers
- ideal for people prone to cold fingers or toes
- highly effective during long breaks, waiting periods, or static tasks such as working with tools or a tripod
5) Short Winter Trip vs. Full-Day Winter Outing – What Changes?
Winter conditions have one defining characteristic: the longer you stay outside, the more cumulative cold, fatigue, and moisture take their toll. For this reason, the gear required for a two-hour walk differs significantly from that needed for a full-day winter outing—not only in terms of comfort, but primarily in terms of safety.
✅ On a short trip, you rely on a relatively quick return to warmth.
✅ On a full-day winter outing, you rely entirely on what you are carrying and wearing.
Short Winter Trip (2–3 Hours)
Suitable for stable weather, familiar routes, and locations where a retreat is easily accessible (car, shelter, town).
Recommended Equipment
🔵 1–2 extra clothing layers
A spare insulating layer or a lightweight jacket in your backpack for colder breaks.
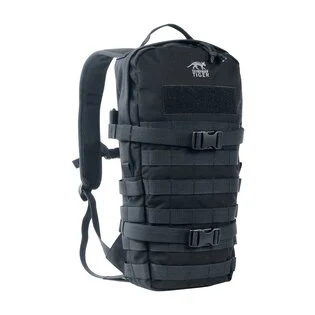
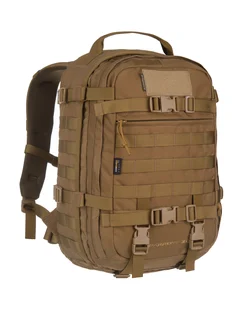
🔵 Lightweight backpack
A 10–20 liter pack is sufficient for basic essentials.
🔵 Headlamp
Even on short trips, daylight is limited in winter. Returning at dusk is a common scenario.
🔵 Thermos
A warm drink significantly improves comfort and helps maintain core body temperature.
🔵 Basic first aid kit
Adhesive tape, plasters, and a thermal emergency blanket—nothing more, nothing less.
🔵 Traction aids (if icy conditions are expected)
Microspikes or similar traction devices greatly increase stability and confidence on both urban and forest trails.
Practical Difference
On a short winter trip, simplicity and low weight are the priority—carry only what you genuinely need, but make sure those essentials are reliable.

Fast energy that won’t freeze. Quality jerky is an ideal fuel for winter routes—easy to handle even with gloves on and ready to deliver energy when temperatures drop.
All-day winter expedition (6–10 hours)
A long route means longer exposure to cold, more energy burned by movement, and greater demands on self-service and safety.
Recommended equipment:
- Complete three-layer system
Base layer, insulating layer, shell. In the field, you often use ventilation and change the intensity of insulation. - Spare insulative layer for a backpack
Down jacket or synthetic jacket. In winter, it determines comfort during breaks and safety when the weather worsens. - 1–2 pairs of gloves One pair of work/light gloves, one pair of thick gloves. Wet or sweaty gloves are a big problem in winter.
- Energetic Food for the Whole Day
A mix of quick and slower energy. In winter, you burn more calories than in summer. - Larger Thermos
0.75–1 liter per person. For longer trips, feel free to take a second thermos. - Full navigation equipment
Map, compass, phone + power bank. Not all sections have signal, and electronics quickly lose capacity in the cold. - Traction devices or snowshoes according to the terrain
- traction cleats → ice and hard surface
- snowshoes → deep, soft, or drifted snow
Important: On a full-day expedition, you do not have a "quick return." Therefore, it is advisable to have equipment in your backpack in case conditions worsen.
Preparation is key for safe winter hiking
Winter hiking offers great experiences if you dedicate thoughtful preparation. Proper layering of clothing, reliable footwear, and a well-packed backpack form the basis of safe and comfortable winter movement in the terrain. The longer and more challenging the trip you plan, the more important the details that keep you warm, dry, and in control.
If you want to continue further — to more challenging routes, exposed terrain, or if you plan to stay overnight outdoors — visit the second part of this series: a winter hiking guide for advanced hikers. There, we focus on working with icy terrain, using crampons and non-slip devices, choosing bivouac equipment, and handling crisis situations.
Readers are further interested